As a beginner to tramway modelling I was keen to get as much experience from other modellers before embarking on my own layout. I was a little lost for direction until I purchased David Voice's book on “How to go Tram & Tramway Modelling.” Obviously joining the TLRS and receiving the “Tramfare” magazine has also helped enormously. The biggest challenge I set myself was achieving a realistic setts effect; I gave up trying to score the markings with a scalpel and looked at creating a setts stamp. I made several before I was happy with a tool that created a consistent pattern.
The setts punch was made out of plastic card with courses 0.5mm thick (Fig.1). The punch was applied to the DAS modelling clay after rolling out the excess clay with a specially turned aluminium roller (Fig.2). The roller shape was such that it left two grooves 1.5mm wide x 1.5mm deep and also left the centre of the track 0.5mm below the height of the rails, as recommended by David Voice. I have also found that Faller make a road paint, which looks very effective after applying to the setts and road. I have made smaller versions of the punch (Fig. 1) to allow me to create setts for the inside sections of the Hornby points on my layout.
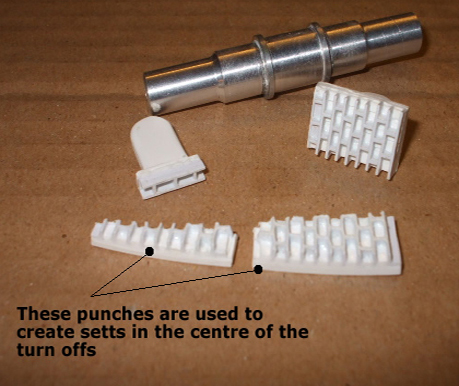
Fig. 1 Cobble Tool - Click here for drawing of setts Tool (PDF- zipped)
Fig. 2 Roller Click here for drawing pdf of Roller (PDF - zipped)
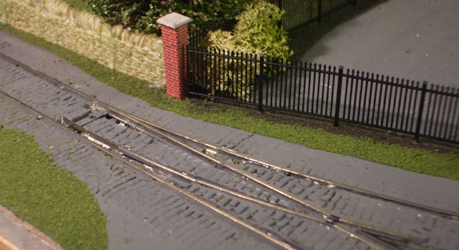
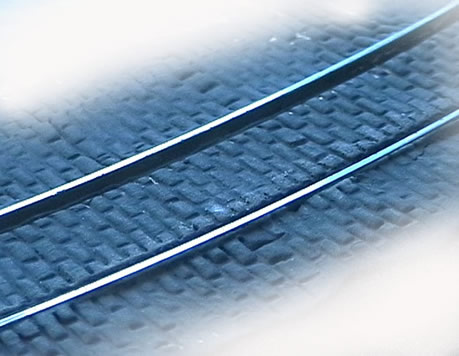
Fig. 3 Sample Track
BACK TO TOP
|