I am a design engineer and the tram layout has been on the cards for years! I have drawn many grand designs in my spare time using a 3D CAD modelling package. Due to space restrictions I finally decided on a small layout which can be easily transported in and out of the loft.
The layout is 1400mm x 500mm with a sundeala board mounted to a wooden frame-work. I enlisted the help of my father in constructing the framework and mounting the sundealer board. The rest of the layout is down to me.
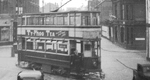
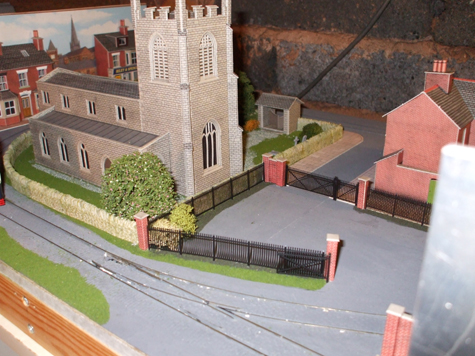
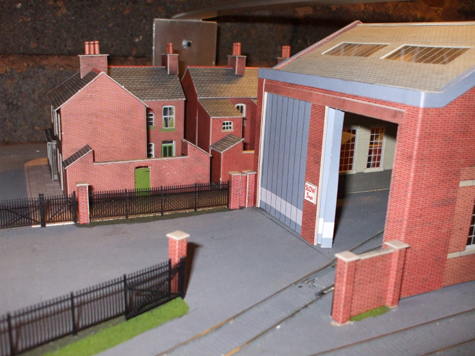
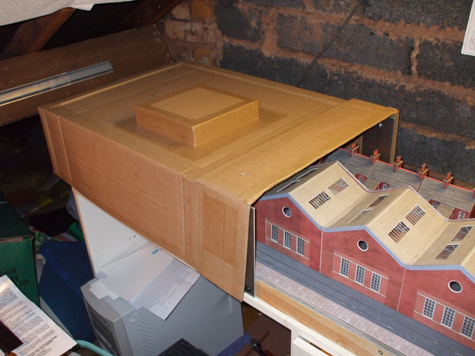
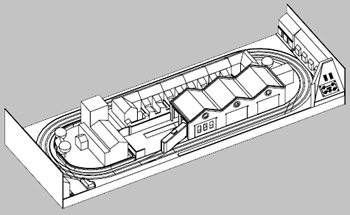 The track comprises of a basic loop with a turn off with two sidings. The two sidings are hidden by the tram depot. I searched everywhere for a building large enough to house double-deck trams without success. I was therefore forced to build this depot from scratch. To do this I used a combination of Metcalfe red brick sheets and the Metcalfe Bus depot. The track comprises of a basic loop with a turn off with two sidings. The two sidings are hidden by the tram depot. I searched everywhere for a building large enough to house double-deck trams without success. I was therefore forced to build this depot from scratch. To do this I used a combination of Metcalfe red brick sheets and the Metcalfe Bus depot.
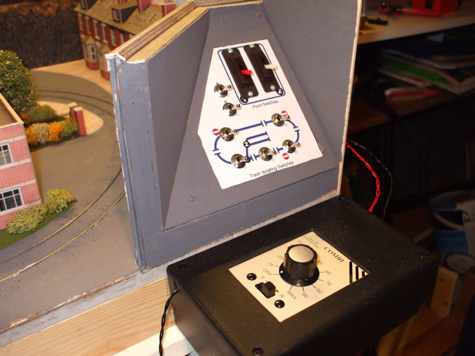
The track is sectioned in several places to enable more than one tram to be operated. the idea for this was taken from David Voice's 'How to go Tram & Tramway Modelling'. The trams are powered by the two rail method. Electrically powered overhead wire was not considered. The details of the electrical circuit can be found by clicking here (circuit diagram)
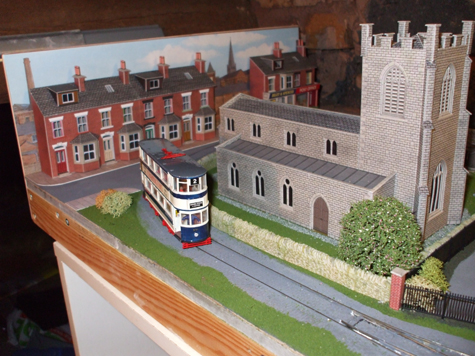
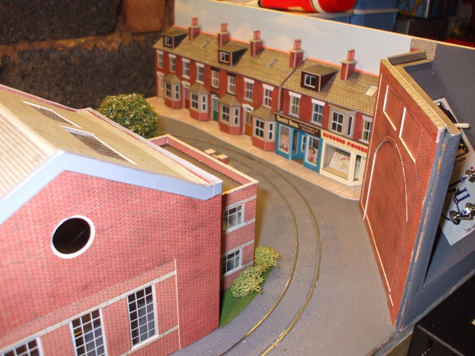
The rest of the buildings on the layout are card Metcalfe kits. In December 2007 all the buildings and scenery were stuck down with PVC or display mount (spray glue), the tram depot being the exception; this is so it can be lifted off the layout if any of the trams get stuck. There are only two trams in the fleet at the present and still plenty of detail left to add, such as people, street lighting etc.
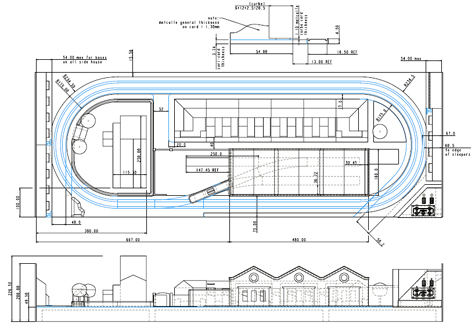
Click Here to open a PDF (zipped) document of the plan
BACK TO TOP |